The most popular dumpster rental size is a 20-yard dumpster.

Small Dumpster Rentals for DIY Home Projects: How to Choose the Right Size
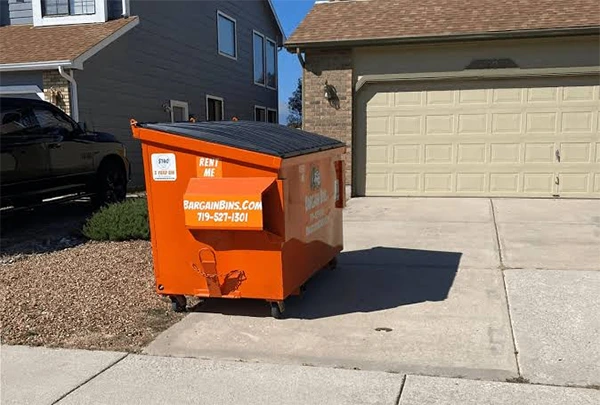
A DIY project often helps in improving a home’s comfort, function, and appeal. When you do a little update, it might leave some debris behind. The driveway or work area can be crowded with old flooring, broken cabinets, packaging, yard waste, and unwanted furniture. A small dumpster rental can be a convenient way to manage that waste, but choosing the right size takes more than guessing how many bags or boxes will fit.
A well-planned cleanup for homeowners preparing a property for sale, moving into a new home, or simply tackling a long-delayed project can help protect the home’s presentation and keep work on schedule.
Table of Contents:
- Begin with a Clear Project Inventory
- Understand Container Capacity
- Consider Both Volume and Weight
- Match the Size to the Project, Not Just the Room
- Consider How Debris Will Be Loaded
- Plan for Items That Cannot Go In
- Measure the Placement Area
- Avoid Choosing a Size at the Exact Limit
- Ask Questions Before Booking
- Make Cleanup Part of the Project Plan
- FAQs
Begin with a Clear Project Inventory
Before comparing container sizes, make a note of what you plan to remove. “Updating a bathroom” could mean replacing a vanity and light fixtures, or it could include removing tile, drywall, a bathtub, flooring, and built-in storage. Those projects create very different amounts and types of debris.
Walk through the work area and note:
- Which items will be discarded
- Which items may be donated, sold, or reused
- Whether flooring, cabinets, drywall, or fixtures are being removed
- Whether the project involves yard waste or outdoor materials
- Whether any heavy items, such as a couch or appliance, need disposal
If you are decluttering to prepare a home for listing, separate saleable or donatable things from true waste before estimating container requirements. Keeping reusable items out of the disposal pile can reduce the space needed and make the process more sustainable.
Understand Container Capacity
Dumpster sizes are mostly measured in cubic yards, which describe volume. A larger capacity means more room for debris, but the label does not tell you everything you need to know. Dimensions, weight limits, and accepted materials can vary between providers.
A compact container may be good for a small cleanout, a minor room update, or a limited amount of light renovation debris. A larger option may be more practical when different rooms are involved or when materials are bulky. These are only common guides. A project that produces heavy tile or concrete may need a different plan from one that creates mostly cardboard, furniture, or light wood.
Ask for the container’s real dimensions, capacity, and weight allowance. If space is limited, its footprint and height might be as important as the volume it holds.
Consider Both Volume and Weight
It is easy to think only about whether debris will fit. Weight needs equal attention. Household items, packaging, and wood may take up enough space without being especially dense. Concrete, brick, tile, soil, and roofing shingles can become heavy immediately, even when they do not fill the container.
A container’s weight limit may be reached before it is full. If you are removing heavy materials, tell the provider what the project includes and ask whether those materials should be loaded separately or handled under specific rules. Do not think that an empty-looking container can safely take more heavy debris.
This is actually relevant for DIY renovations. A small bathroom project may involve only a few square feet of floor, but tile and mortar can weigh much more than a relatable amount of carpet or laminate.
Match the Size to the Project, Not Just the Room
Square footage can help you start an estimate, but it does not reliably predict how much waste a project will create. The amount depends on what is being removed and how it will be prepared for loading.
For instance, replacing carpet usually produces less dense debris than removing tile and underlayment. A kitchen refresh that keeps the existing cabinets may create a relatively small load, while a full demolition that includes countertops, cabinets, flooring, and drywall will need more capacity. A garage cleanout may produce a large volume of heavy items, even if the materials are light.
Think through the project in layers. A wall might involve drywall, studs, insulation, trim, and wiring. A floor may include finish material, adhesive, underlayment, and subfloor. If you are unsure what lies beneath a surface, allow for the possibility that the work will uncover extra material.
Consider How Debris Will Be Loaded
The way you break down and load items influences how much usable capacity remains. Flattened cardboard and perfectly stacked boards take up less room than mixed, irregular debris. Cabinets may fit more efficiently if dismantled, while furniture can take a lot of space when left intact.
Think about what is practical for your project. A DIY homeowner may not have the time or tools to carefully break down every item. Some materials might also be unsafe to dismantle without the right equipment or precautions. Estimate based on a realistic loading plan instead of an ideal one.
It can help to load large, flat items first and fill gaps with little debris, provided you follow the container’s safety rules. Keep materials below the fill line and do not leave things sticking over the sides. Overfilled containers may be unsafe to transport or may not be picked up until corrected.
Plan for Items That Cannot Go In
Not everything from a home project fits in a standard dumpster. Restrictions may apply to paint, solvents, chemicals, batteries, propane tanks, electronics, appliances, tires, and other items. Rules differ, so ask what is accepted before loading.
Older homes may contain materials that need special care. If a renovation could disturb suspect insulation, flooring, coatings, or other building materials, find out whether testing or regulated removal is appropriate before starting work. Do not place potentially hazardous items in a general container unless you have confirmed that it is allowed.
Set aside materials that may be donated or recycled. Usable furniture, fixtures, metal, and certain building items may have a second life, depending on their condition and local programs. Sorting before the container arrives can avoid confusion once the project is underway.
Measure the Placement Area
A container must fit your property and be accessible to the delivery vehicle. Measure the intended placement area and test the route from the street. Look for low branches, overhead wires, narrow gates, parked cars, steep slopes, soft ground, and tight turns.
Ask the provider how much clearance is required for delivery and pickup. The truck may need more room than the container’s footprint suggests. Also think about whether the surface can support a loaded container and whether you want to protect a driveway or paved area.
Placement is important for convenience, too. A container close to the project may reduce carrying distance, but it should not restrict a garage, walkway, shared driveway, fire access, or a real estate showing path. If the home is on the market, consider how the container will influence curb appeal and whether it can be placed out of sight during a showing.
If you plan to place it on a street or another public area, check local permit needs before arranging delivery. A quick check can avoid delays or unexpected complications.
Avoid Choosing a Size at the Exact Limit
DIY projects often uncover surprises. A wall may have additional layers, a cleanout may reveal more unwanted items than expected, or a planned repair may expand once work begins. Leaving a little room in your estimate can help account for that uncertainty.
At the same time, selecting the largest container by default may not be the best value. Compare the cost of extra capacity with the possible cost and inconvenience of arranging an extra pickup or rental. Ask how charges work if the container exceeds its weight limit or if you want it for longer than expected.
A good estimate balances the project’s likely waste with the cost of flexibility. If the scope is uncertain, discuss that uncertainty when requesting a recommendation.
Ask Questions Before Booking
A brief conversation with the provider can clarify details that are tough to determine from a size label. Share the project type, materials, approximate quantities, and planned placement location. Ask:
- What sizes are available, and what are their dimensions?
- What weight limits apply?
- Are heavy materials managed differently?
- Which materials are not accepted?
- What clearance is required for delivery and pickup?
- How long is the rental period?
- How are additional weight, extra time, or additional pickups handled?
- Are permits required for the planned location?
Photos or measurements can help when the project includes several rooms, dense debris, or limited access.
Make Cleanup Part of the Project Plan
A container is most useful when it is coordinated with the work. Schedule delivery for the point when debris removal will begin, instead of leaving it in the way for days. Keep a clear route between the project area and the container, and make sure everyone involved knows what can be loaded.
For a home being prepared for sale, plan cleanup around photography, open houses, and other property work. A tidy site is simpler to show and safer for contractors, household members, and visitors. Prompt removal of debris can also help keep walkways and entrances clear and pretty
Selecting the right size for a DIY project means looking beyond the number of rooms or the name of the renovation. Estimate the materials, account for weight, plan for how materials will be loaded, and check the property’s access and placement constraints. With those details settled ahead of time, waste removal can stay a manageable part of the project instead of an unexpected obstacle.
FAQs
What is the most popular dumpster rental size?
What is the standard size of a dumpster?
The standard size of a dumpster is 2 to 8 cubic yards.
How do you know what the right dumpster size is?
The right dumpster size usually depends on waste volume, material weight, and pickup schedule.
Related Posts