Ans: It will generally cost you between $4,000 and $25,000.

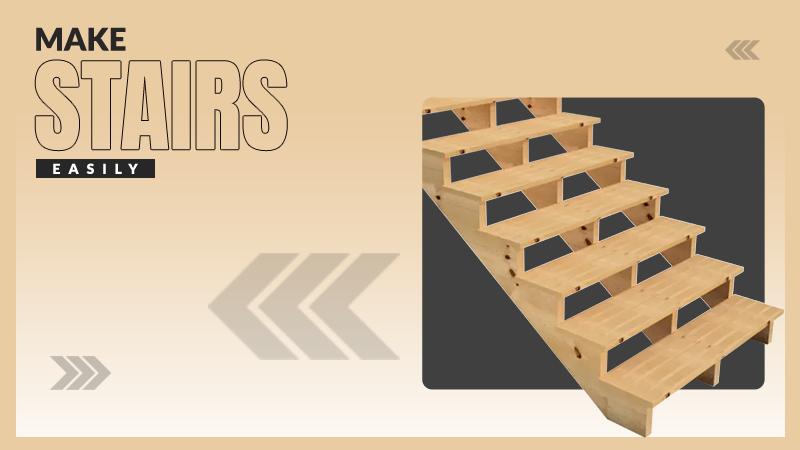
How to Build a Shed in Simple and Easy Steps?
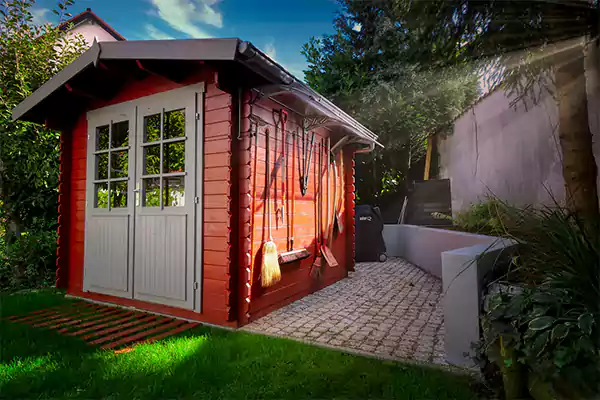
Whether you need an extra storage room or a personal space for pursuing hobbies in peace, a shed is the best traditional option! It can be built in days and instantly put to use by the property owners. So, if you need this tiny structure and thus want to learn how to build a shed, this guide is for you.
With the help of 12 simple steps, you can have a complete outline of the entire process. Teach yourself how it works and build the shed of your dreams! Also, read how much money it might cost you on average so that you can budget your project better in advance.
Table of Contents:
How to Build a Shed?
If you asked, ‘How to build a shed?’, the first thing you need to listen to is that it is not that tough. With the right guidance, you can make it! So, typically, the process involves the following:
- Foundation type
- Assembling the floor frame with sheeting
- Framing the walls
- Assembling the roof frame
- Setting up siding
- Adding plywood to the roof frame
- Covering the roof with shingles
- Assembling windows
- Fitting doors
- Finally putting a gable vent in place
Consider this process in 12 simple and detailed steps below.
1. Foundational Development
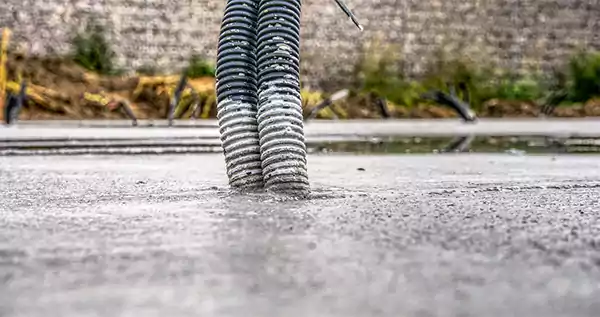
Once your shed building plans are prepared, proceed with the first step. Select the most suitable shed foundation out of the available options. The type you select mainly depends on the nature of the shed you want to build. However, a brick and concrete base is the best for high strength and long durability.
So, dig trenches, at least 1 foot wide and 1 foot deep, and fill them with concrete. Once it is hardened, lay bricks with mortar evenly. To provide a rough idea, your foundation must measure 10 feet and 7.5 inches for each side.
2. Assembling Floor Frame Components
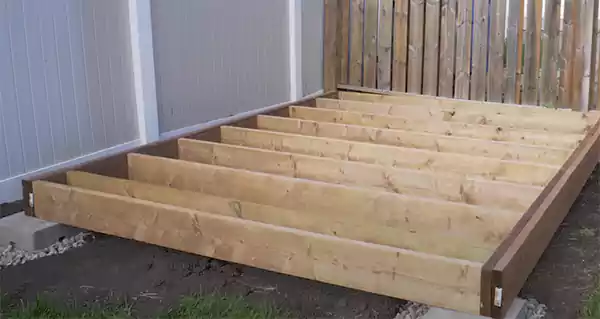
Once your foundation is complete, it is time to put together all the components of the floor frame and install it over the base. The floor frame is a structure that is composed of rim and band beams, which support the floor from beneath. To assemble joists properly, ensure that you have nailed each joint and end properly.
3. Floor Sheeting
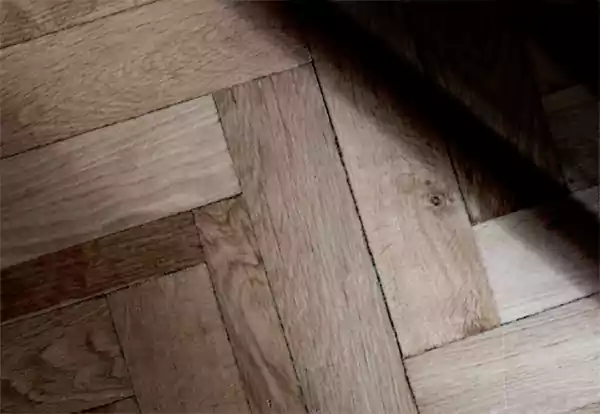
Over the floor frame goes a wide sheet of plywood to serve as the actual floor of the shed, where the owner will tread and walk to carry out day-to-day activities. Thus, the quality of the sheet is of high importance. If you choose an interior material, it will give way over time, as it is under the most stress.
4. Wall Framing
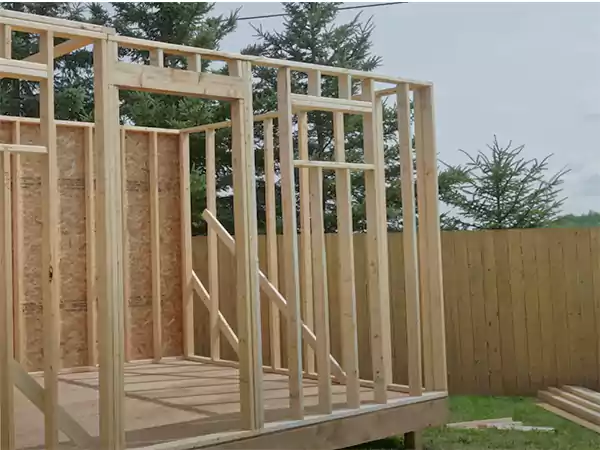
Shed walls typically depend on the shape of the roof. For example, if your roof is going to be sloping, two walls will have triangular upper ends (gable-end walls), while the remaining ones will be rectangular with no triangularity. However, for a flat wall, like in urban areas, there is no need to build gables. So, accordingly, build wall frames and assemble them.
5. Assembling the Roof Frame
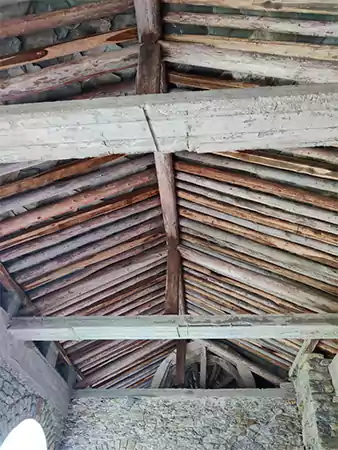
Building a shed might feel the most demanding when it comes to creating the structure of the roof frame. A sloping roof frame is the toughest to create due to its highly intricate and fine details.
First, take a beam and attach two other beams at both its ends in a triangular shape. This will create a prism-like structure. Next, create more such pairs of triangles in between inside the prism and secure them with narrow boards and nails.
6. Installing Exterior Siding
Not just the protection from the elements, durable and tough siding also offers a heightened curb appeal to the shed’s exterior walls. So, according to the dimensions of your wall, decide on the number of siding units you need and then apply them to the walls.
Suppose the height and length of the wall are 300 cm and 200 cm, respectively. And, you have decided to use lumber pieces where each unit measures 300 × 20 cm. In that case, you need 10 such lumber rectangular beams to cover the exterior part of the wall.
7. Adding Plywood to the Roof Frame

Get some good-quality plywood and cut it into appropriate pieces. You need to cover your entire roof frame with them using nails and a hammer. This is the first layer over the roof from the outside. It is a relatively easy step compared to the ones discussed above.
You can also use wood screws for a higher level of security to fix the plywood pieces. And, be careful during the process to discard any plywood that is broken or defective from the side of the manufacturer.
8. Cover the Roof with Shingles

It is time to cover the entire plywood coating with asphalt singles, the most affordable and yet strong roofing option that provides complete protection from the elements.
Every type of shingle comes with specific instructions for use, either printed on the box or provided in a booklet inside. Thus, don’t forget to follow them and avoid mistakes that can cause water leakage issues later.
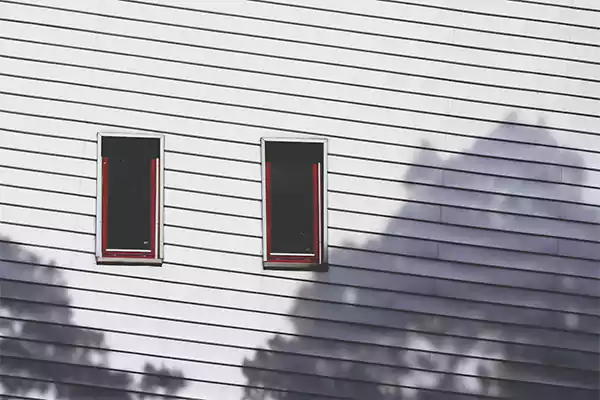
9. Work on Windows

Assemble all the components of a window and then fit it on the desired wall. One window is necessary in a shed, thus it could be either on the wall that is standing opposite to the door, or one of the non-gable walls.
However, many even like to add such a structure on the roof for sunlight, which is not so popular, as it adds a layer of sophistication to the overall structure of the roof framing.
10. Building Doors

Measure the length and breadth of the door and accordingly create a rectangular frame with the help of quality processed timber. Once the frame is ready, take narrow beams and fix them inside the rectangle horizontally for support.
Afterwards, apply a generous coating of any material that helps keep termites away from the wooden structures. Ultimately, add plywood boards on either side, and your door is ready to be attached to the wall with hinges.
11. Installing the Ventilation System
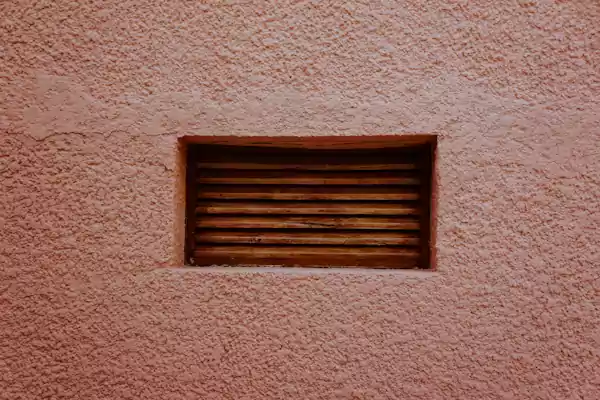
The window and door both indeed serve as integral parts of the ventilation system. Yet, many can also consider installing a gable vent right above the window or the door, wherever most suitable. It will add an extra space for better air circulation and interior temperature control. To fix it, you just need wood screws or even nails would do good.
12. Installing the Window Shutter, the Roof Drainage System, and the Door Ramp (Optional)
The following is totally optional, but might add depth and functionality to your shed!
- Consider installing a window shutter, which is a frame to cover the window panels from the outside. It is a great saviour during the bad weather.
- Additionally, install a roof drainage system if you are building a shed in a tight space, adjacent to your residential property, as it will keep things less messy during heavy rains.
- Many sheds aren’t completely levelled with the ground outside, and thus, it creates an elevation, which makes it challenging to move things from outside to inside through the door. In this situation, putting a good-quality door ramp will work best.
Before concluding, it is crucial to clarify that even if you need to learn how to build a storage shed, the process remains the same. You just need to adjust the size of the overall shed according to the storage capacity you want.
Exclusive Read: Get a General Construction License in California
Is it Cheaper to Buy a Shed Than to Build?
Materials, labour, tools, permits, foundation, etc., affect the cost of a shed development. The approximate cost of building one is tabularised below. You can compare the total cost provided below with any ready-made shed kit and have an idea yourself whether you should build or buy!
| Factor | Building a Shed | Buying a Shed |
| Materials | $1,000 – $5,500 | Included in the price |
| Labour | $600 – $2,500 | Easy to assemble |
| Tools | $300 – $2,000 | Not needed |
| Design | Full Customisation | Limited Customisation |
| Permits | $600 – $800 | No needs |
| Foundation | $500 – $1,500 | Perhaps, Additional Charges |
| Time | Days to Weeks | Quick Delivery & Setup |
| Total Cost | $3,000 – $12,500+ | $2,000 – $3,000 |
The approximate total cost of building a shed can be $12,500 or even higher! The exact amount depends on the overall specific needs of a particular person. However, when compared to that, buying a shed kit is way cheaper, as the cost hardly reaches more than $2,000 or $3,000.
Moreover, if you have a lot of material freely available at home with being a shed expert, the cost of building will drop drastically. Thus, it is prudent to analyse your situation subjectively and then make any decision in this regard.
Also Read: Tiny House Costs: Learn About Potential Expenses, Key Aspects, Financial Tips & More!
Tips for Hiring a Perfect Shed Contractor
After reading this informative post on ‘How can I build a shed?’, if you find building a shed challenging, don’t worry, as there is a solution even for you. Consider hiring a contractor, and they will build the project for you.
However, you will have to pay for their services, which might reach up to $30,000 from $200, depending on a client’s specific needs.
To hire the best professional, consider these pieces of advice in detail below.
- Define Needs: For different purposes, people need sheds inside their residential properties, such as an extra living space, home office, hobby area, gardening storage, or even general storage. To put it differently, as per the ultimate use, a shed’s conditions and construction costs differ. Hence, defining your needs clearly helps a contractor understand the project better.
- Specify Budget: You must always have a rough idea of the money your project needs, so that you can plan better. Without it, you wouldn’t have a cost bracket to fit contractors in and find out their affordability.
- Analyse All Options: Don’t hire the first developer you meet online or offline. It is a must to first explore all the builders available within reach. Also, rely on quality referrals, such as those collected from friends and family members.
- Consider Experience: Years of experience in building shed-like tiny structures can never be missed when looking for the best builder. The higher the experience is, the higher the competence becomes!
- Verify Credentials: Whether a shed developer or a house builder, a contractor must possess a valid licence, so that you can trust their authority.
- Compare Quotations: When you meet professionals, collect estimates or quotes from each to make comparisons at a later point in time.
- Negotiate: Don’t settle for the first deal. Always bargain to get the best price. If you are relying on construction bidding to choose the most affordable service provider, make sure that you patiently wait for the lowest bid to come eventually.
Finally, never sign any documents unless you have understood all the terms and conditions of the contract. Being careless in this direction might cause you huge losses later when the project concludes and the contractor charges more than you expected.
Exclusive Read: 10 Biggest Construction Companies in the US to Know Before Hiring a Contractor!
Conclusion
We have amply discussed all the crucial aspects of how to build a shed! Building a shed is not that hard, as the structure is very small compared to other construction types, such as a home or commercial building.
Thus, even if you aren’t an expert, you can build the shed of your dream and enjoy an extra space outside your dwelling for multiple purposes. Research well on the internet and collect all the valuable tips and tricks that might prove to be helpful during the construction process! In case you need professional assistance, contact a shed contractor or builder.
FAQs
Q: How much does it cost to build a 20×20 shed yourself?
Q: Can you build a shed for $1000?
Ans: If you are a non-expert and don’t have any materials like lumber at home, it is a challenging project! But, suppose you are a skilled shed maker with materials freely available at home. In that case, it is possible! But, rather than building, you must focus on buying a shed kit with such a tight budget.
Q: How to build a shed on a budget?
Ans: Specify how much money you can afford to spend on your project. Afterwards, allocate the budgeted money on things that are reasonable and doesn’t strain your pocket. You can even consider buying a ready-made shed that just needs to be assembled at home.
Sources:
How to add a backyard shed by Forbes
Related Posts